Photography: a recording media
what is Photography?
photography is the process of capturing still image, as a recording media photograph has revolutionised the modern world in art, science, communication and expression. with the development of light sensitive chemicals in the 1800's photography has greatly evolved from chemical to a digital recording age in a field of art and science which is being progressed and improved up to the present and as a medium photography has a bright future.
photography is the process of capturing still image, as a recording media photograph has revolutionised the modern world in art, science, communication and expression. with the development of light sensitive chemicals in the 1800's photography has greatly evolved from chemical to a digital recording age in a field of art and science which is being progressed and improved up to the present and as a medium photography has a bright future.
Assessment criteria:
Below is listed the basic information which you will need to evidence in your Technical
Workbook. The list contains the minimum requirement necessary for successful
photography. Remember to include Health & Safety considerations. Also you must
ILLUSTRATE your work throughout.
Camera & basic photography:
§ Health & safety issues relating to location based activities (inc. personal safety,
batteries etc.).
§ Digital SLR camera design and operation (Inc. advantages & disadvantages etc.)
§ Digital SLR camera menu features (Inc. Size, ISO, WB, Formatting etc.)
§ Basic compact digital camera design and operation (Inc. advantages &
disadvantages, time lag, focussing distance etc.)
§ Exposure control system – aperture & shutter relationship.
§ ISO system and control.
§ Aperture and control of Depth of Field.
§ Shutter and control of Movement.
§ Priority modes – aperture/shutter.
§ Lenses – Standard, wide angle, long focal length.
§ Composition.
§ Characteristics and use of natural light.
§ Accessories – Tripods/lens hoods.
§ In camera flash.
Digital/IT & basic photography:
• Health & safety issues relating to use of hardware and software (inc. screen
viewing time etc.).
Production
• Camera Colour Space.
• Camera Resolution/Quality.
• Camera Setting Date and Time (importance of)
• Formatting Card.
• Camera Card Types.
• White Balance
Dynamic edited photographs
Andy Warhol
Replicate Image off Marilyn Monroe
Print screen each step |
| starting image |
Editing process
Final image
Panning
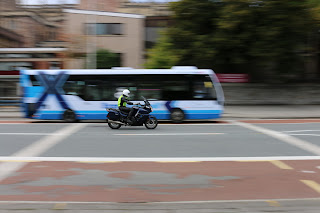
The panning photo is a photograph where the subject is in motion but in clear focus while everything else is blurred in motion. the way to capture the shot is to have the cameras shutter speed between 1/15 & 1/30 and track part of the subject and mach its movement. Its best not to capture the subject on too much of an angle as the subject would be more blurred away from the focus points depending on the direction of movement. The difficulties when panning is following the subject in motion is ganging the speed and the depth of field needed to capture the subject in focus. to help track the subject you could use a tripod or a stable holding position which would allow you to swivel at the same speed.
 this angled panning shot wasn't as successful with most the car out of focus yet the background was much more blurred out.
Camera-less Photography
to create the following images as teams in the dark room*, we put photosensitive paper into a thin layer of water and disturbed the water before exposing it to light via flash gun which lead to some highly intriguing outcomes.
Dark room*: a darkroom is location where chemical recording media like film is processed, Developer 2min, tone 30 sec, fixer 2min & 5 min+ wash
Scanning images
Still life photographs and paintings are images of sets of items displayed in a way to display a mysterious message using the common symbolism of the objects used in the images
Still life photographs and paintings are images of sets of items displayed in a way to display a mysterious message using the common symbolism of the objects used in the images
Practise Images Created
Symbolism used in images
the objects and my interpret symbolism
(try to symbolise the years birth in spring)
Symbolism used in images
the objects and my interpret symbolism
the objects and my interpret symbolism
(try to symbolise the years birth in spring)
Looking through
Research
The term if been given to translate into images is "looking through", but what dose it mean to look through? There are many different ways to describe and show images looking through in both the visual and literal sense
Export & Experiment with the concept
I need to look into different ways to interpret the concept of "looking through"
Images Taken
Faceless portrait
Definition's: Portraits
General definition: Portrait is described in dictionary as depictions of a person or a persons likeness in different forms of media, most commonly using only the face or head and shoulders.
Personal definition: portraits are Images of a person, animal or their equivalent, as long as a interacting factors are present in a image even if it is only a snapshot of a beings life and not the themselves or their likeness. But most portraits depict images of human features, the feature most focused on is the portrait of the face or head and shoulders, but this is not the only possible depiction of personality or humanity out of a image, depending on definition of portrait images of other anatime could be used or even a indirect photo like a shadow could be used to represent a portrait of some one or even something.
Ideas:
Use Parody, satire or bizarre scenario
Change dynamic of object
Long exposure & use of blur
focusing on actions of the subject
The interesting features of the subject
Capture personalty
Interaction with environment
Philosophical meaning
Shadows
Composite images
Editing/ Photoshopping the image
Commercial imagery
Use Parody, satire or bizarre scenario
Interaction with environment
Philosophical meaning
Shadows
Composite images
Editing/ Photoshopping the image
Commercial imagery
Photographs
I took my images in the literal sense, hiding part or all of the face out of shot. the images show more emotion than story, manipulating viewers to desire to want more out of the subject to gain a little more of the identity of the subject.
Clifton studio
Group work
this unit could be described as Experimental imagery and art photography
Painting with light & long exposure
Theme- Night/ low light/ long exposure
the theme is night photography where the aim is to ether take photos in the dark or out at night
set up and equipment: shutter priority, tripod
planning
use led to create light trails
go outside on evening to coast
Photographers
Michael Bosanko
Janne Parviainen
Personal images
the light trails of two cars close behind each other showing the paths they took
light trails of a car heading towards the camera
the light trail of traffic from above
light trail from a torch making a trail of the stalk of a pear
Custom and specialised cameras
Pinhole cameras
Creating Stop Motion in Photoshop
creating the stopmotion file got me familiar with the Photoshop basics,Starting up, the key features & task bars yet it would be more helpful to get familiar with the Photoshop keybindings.
Street Portraits & photography
The "street people" assignment will have me go out into the public and get close to people in urban spaces and documenting the types of things I see while I am out, but to get close to my subjects I will need to gain the confidence to ask people If I am able to take a photo of them then communicate with the public so that I can take the perfect image. I will also need to be vigilant to find the perfect opportune photograph as some of the more sporadic photograph can be more effective, which is best when the subject isn't aware that they are having a photo taken of them or at least look unaware.
Techniques for street photography
communication vs distance
personal images & process to completing the task
While out and around Bristol's urban center I looked for subjects of interest who were doing things that create some sort of emotional reaction from the viewer that makes them want to interpret the image and project their own story onto the image.
To explain reasons of interest & points of interest around subject I will explain the circumstance the photographs were taken in and the ways people would connect to them and interpret them.
To explain reasons of interest & points of interest around subject I will explain the circumstance the photographs were taken in and the ways people would connect to them and interpret them.
A lone worker was on his phone, unaware of all going on around him, I was in millennium square and I was sitting across from the worker who was all alone on a bench on his phone while not to far off a group of similar workers who were sitting together talking, though I wasn't able to fit in the other builders, the loan worker was still a interesting subject by the way he was isolated looking at his phone in his white work overalls. The environment around him was also interesting
A large number of people patiently waiting for their buses,
Four strangers sitting in close proximity to each other, I found these people interesting as non of them were interacting with each other but they all had small similarity and differences between them. I found it strange how each person was in their own personal bubble and wee almost completely unaware of the people around them, but there was also interest in the environment with the patterns on the pavement and the street and its advertisements displayed in the background.
scruffy looking gent posing for a photo with a grin on his face and a devil may care attitude
A woman smoking outside of a closed off door in-front of a formal building, This image rely stood out as I found it interesting how the woman casually interacted with her environment and the great interest in the backdrop with the taped off door. The taped off door is the main subject in this image and the woman who was smoking while she was on her mobile relay adds to the atmosphere of the image. The image makes you think of potential scenarios or stories behind the door and the identity of the woman and who she was calling.
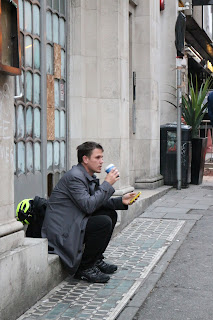
Man sitting on the step of a closed and vandalised building drinking a hot drink while on his phone, I found out a lot about this person from this one image as by looking at the bike helmet his backpack you can tell that this man is relatively health and sporty by the way he rides a bicycle to work and the image has details that are left to speculation like the way the building was vandalised and what this person may do for a living.
Woman handing out fliers by the road side while dressed in formal attire,
Man looking at clock tower at end of the street, the gent was looking for directions and was lost in Bristol, His confusion with the unfamiliar surroundings was quickly apparent by the way he had a pamphlet or map out and was looking for recognisable landmarks to find out his location. The way the street leads up to the clock tower highlights what he was looking at and what he was doing.
A man older in years concentrating reading a news paper on a bus, I saw how this gent was reading his news paper while also unaware of his surroundings. This is a interesting contrast to the way the younger generations dependent on their phones and how maybe it is not so different to people reading books on the bus to detract themselves away from their environment and the people around them.
a male and female teenagers in conversation in the middle of the street, the female is holding onto her bike during the conversation, the male has a back pack on so he is likely a student,
Environmental portraits its difficult to take photos in natural light as it is not easy to control but some photographers use portable lighting and reflectors to light up the subject, and to also understand the Location, situation & composition. the Portrait composition is important and to crete good Portrait one would need to be aware of creative composition, Distance, Rule of Thirds, Space in frame, Cropping & Camera angles.
Back lighting & studio setups
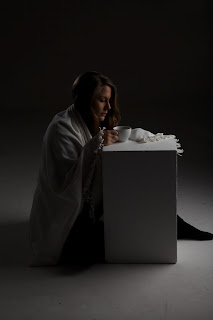
this studio setup is a four softbox light setup where there are two levels of lights set to different strength outputs, the light level set at the background is set to the highest light output to overexpose the white background while the level in the foreground is on a lower level and is used to light and fill out the shadow on the subject. the foreground level is subject to change depending on the desired effect wanted on the subject while the light in the background remains constant until the background itself is subject to modification.
Portraiture "after the style of"
Replicate the styles of studio photographers (2+ photographers)
The selection of Photographers Sampled:
Richard Avedon,
Robert Mapplethorpe,
Cecil Beaton,
David Bailey,
Annie Leibowitz,
Horst P Horst
 |
| The studio set up |
The Unedited Photographs
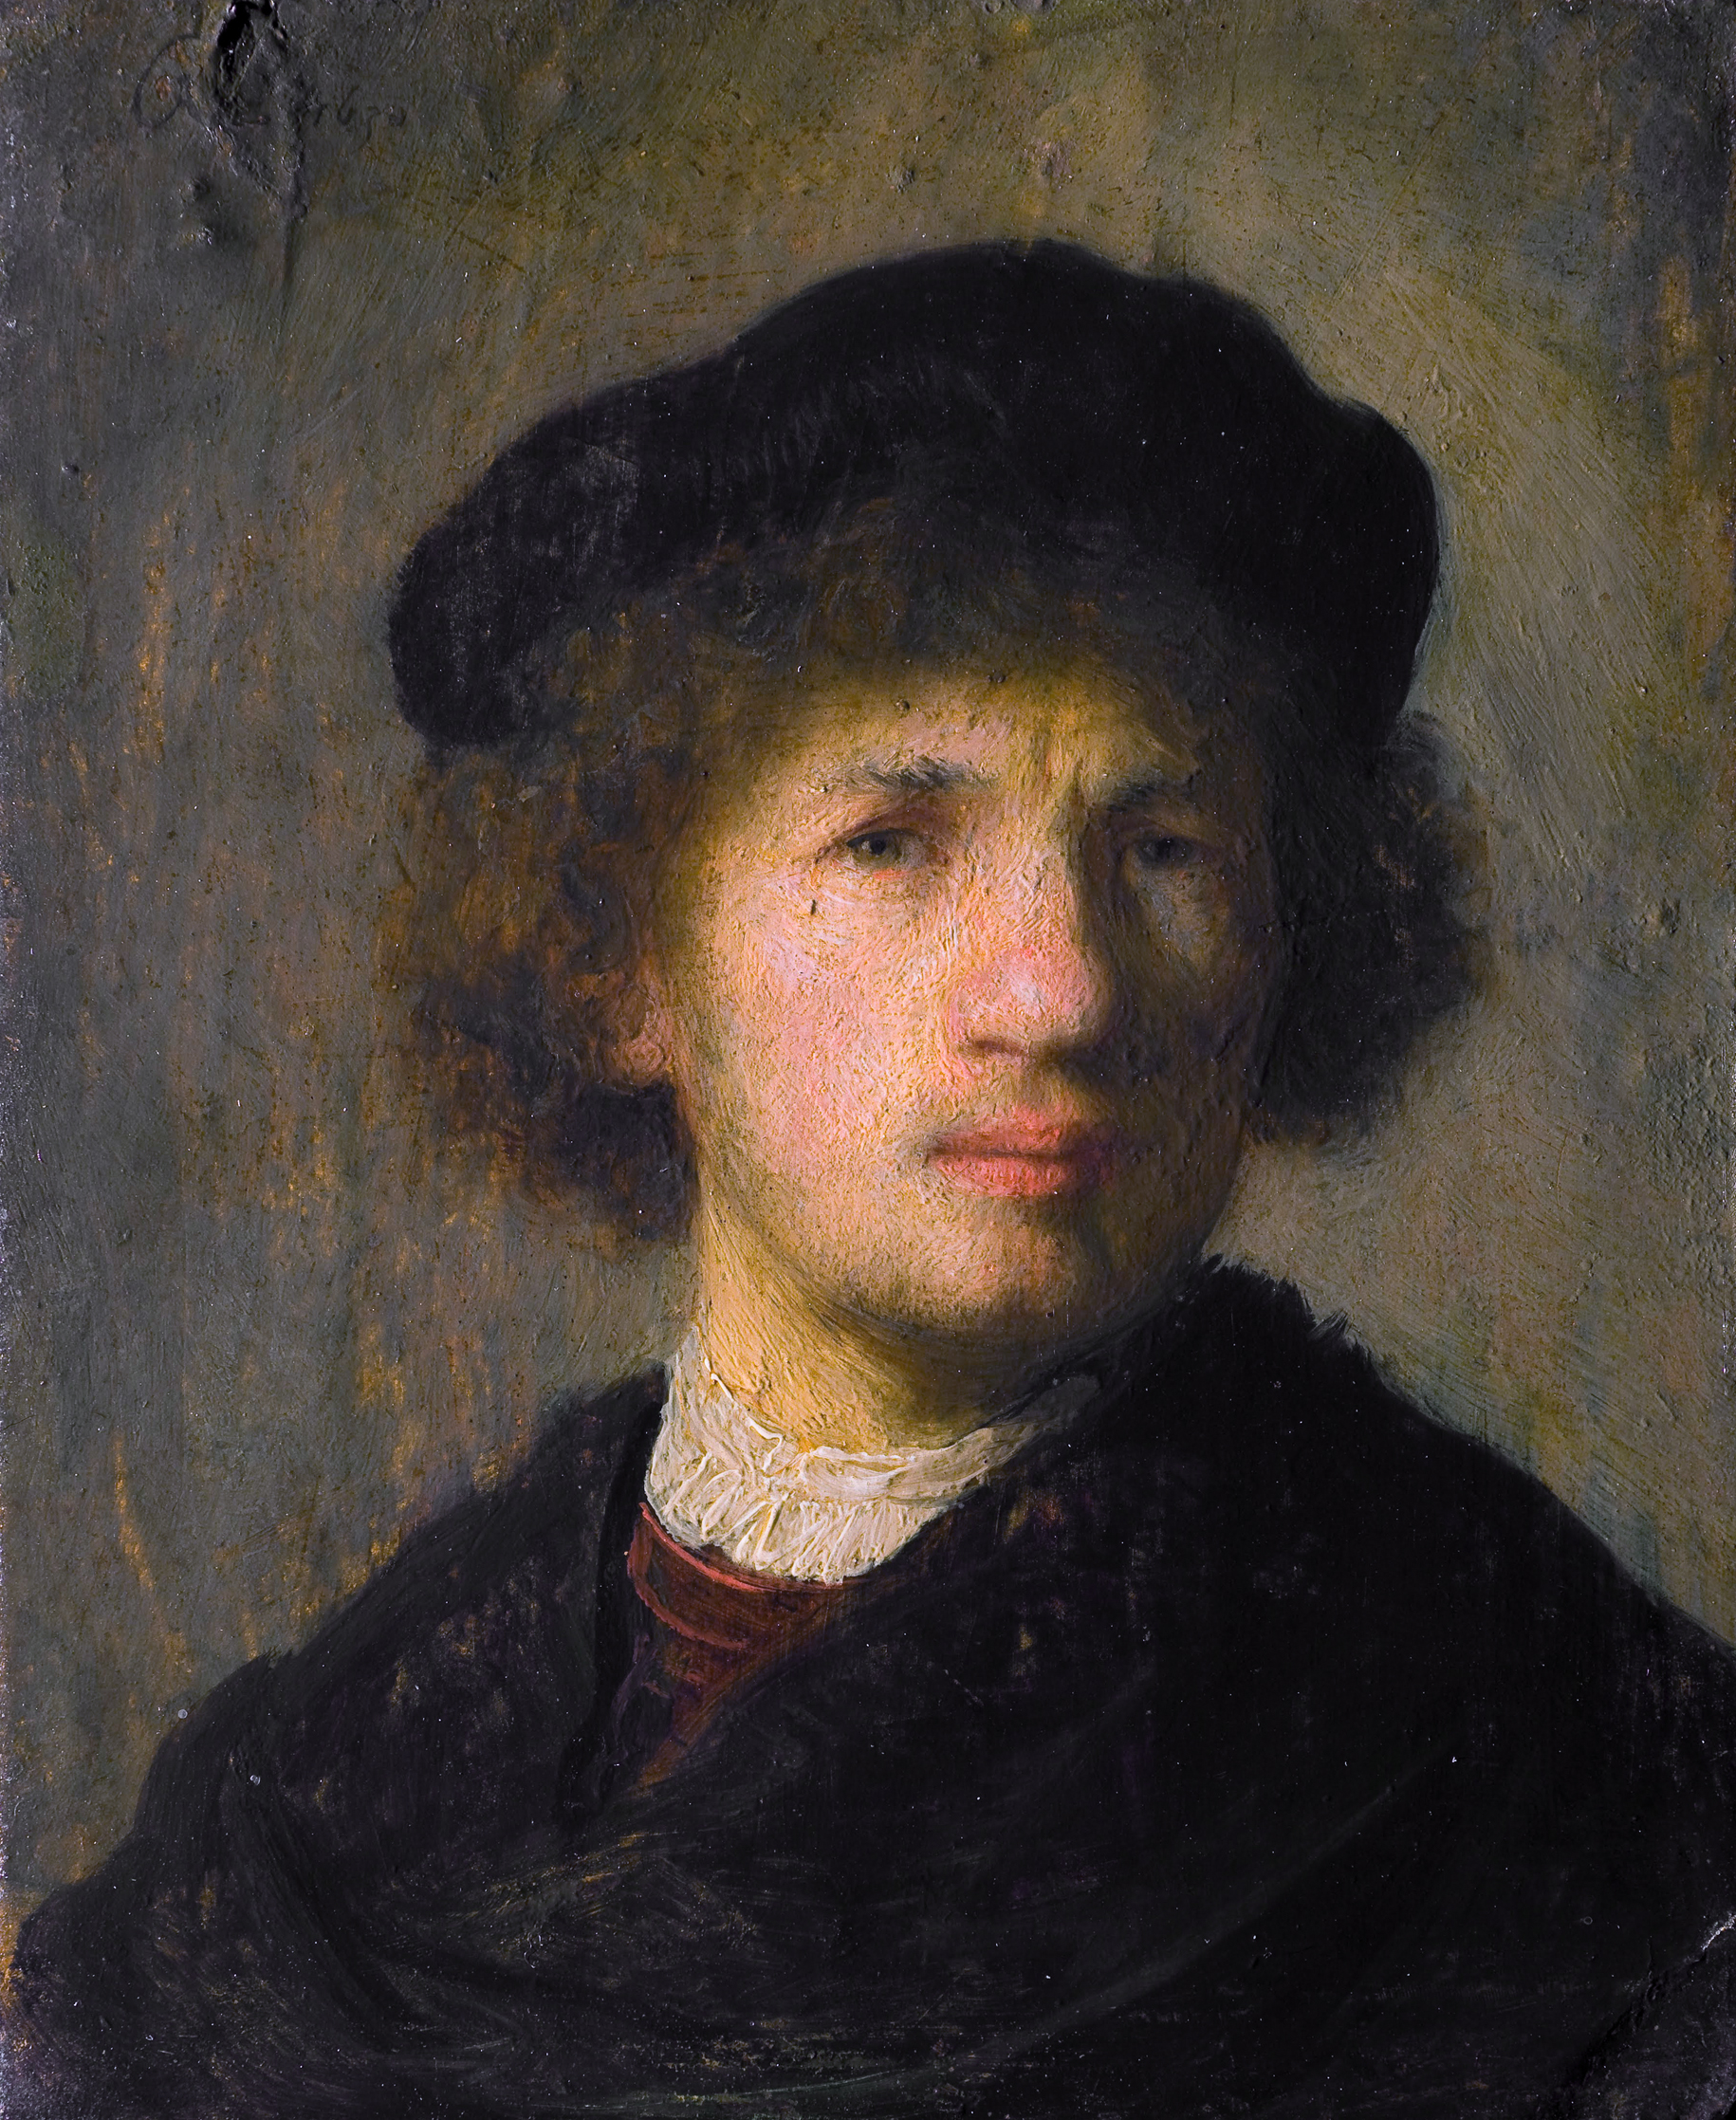
Rembrandt portraits
Rembrandt was a Dutch rinansons painter who was active in the early 1600 and is famous for his portraits and self portraits. his portraits were photo realistic and very detailed but also have great focus on light and shadow and its effects on the face, the details I was tasked to recreate in a photograph was the way the shadow side of the face has a triangle of light of the cheek.
To get this effect in a controlled studio environment the light would have to be soft and filtered out and the light its self would have to be shone down from a angle just higher than the subjects face, the light would also have to shine across the face from a angle just in front of the subject (example images:)
A portrait taken of one of my classmates shows lighting from a single source angled across the front left of the subjects face, with the right side of the face angled to the camera it is clear to see the triangle of light under the right eye. The triangle of light under the left eye makes this constitute as a Rembrandt portrait
the set up was a single soft box studio light utilising a tripod to keep the came stable
the position of the light, camera and subject when getting the rembrandt effect
this image is not a Rembrandt image because there is no triangle of light on the cheek on the dark side of the subjects face.
With the light and subject angled appropriately a small amount of light will high light the side of the face furthest from the light.
the light on the darker side of the face gives the subject more definition and detail, it also creates an interesting contrast between the shadow side and the light
Snoot highlight
using a snoot in a studio can highlight the hair of the subject, giving the image fill at the same time
using a snoot in a studio can highlight the hair of the subject, giving the image fill at the same time
a soft box doesn't get the same direct on the subject while a snoot spotlights the subjects hair
Studio Lighting: one light setups
When taking photograph the photographer must always be aware of the available light, but light can be adjusted and changed with reflectors and additional lighting. In a studio setup the modification of light is easy to control, with the light sources being mobile and rearrangeable the light can be directed at almost any angle relative to the subject. The angle the light hits the subject brings out contours and features in its surface those areas are highlighted in the for of shadows. Shadows can be many different effects that can be used in composing the image.
the effects of different directions on the subjects effect fill and shadow
the effects of different directions on the subjects effect fill and shadow
using a single light source from on angle
using a reflector helps bring up the exposure onto the darker side of the face giving the subject grater definition
using reflectors or reflective surfaces in studio photography are used to fill out the shadows on the face of a subject
Without a reflector using a reflector
 |
| view of the studio set up |
 |
| The lighting setup used for adjusting a single light |
Something to keep in mind when taking photographs of subjects with glasses is to raise the light to a point where the camera doesn't pick up the direct glare on the lenses and while in a Digital studio environment being aware of studio flash settings of manual vs auto and its effect on the studio environment, to become better aquatinted in a studio it would be wise to become familiar with the inverse square law.
Lighting, Studio Equipment & Accessories
When in a photographic studio there is a large amount of equipment you would need to get familiar
studio lighting:
monoblock light
a monoblock light is a modular lighting and generator system that is used as the standard studio light and are usually come in the form of continuous light source like tungsten light units, the tungsten light gives of high light output but the problem with these lights is the excess heat and the hard and sometimes harshness of the light. HMI monoblock lamp units give off less heat for a similar light output but are more expensive, fluorescent lights are a good substitute for tungsten and HMI lamps with the small sacrifice to output. when using certain attachments the monoblock can be used as a studio highlight flash, a fill light or halo flash. the amount of modular adaptations to the monoblock makes it very desirable a a general studio light and uses specialised built in features which allow the modification of the strength of the flash and model lamp and can also have built in slave sensor. if a total of three or more monoblocks are used in a studio can create a very versatile environment.
modeling lamp
the modeling lamp is the light used to gauge the effect of the flash on the subject, the lamp helps check where the light will hit and where the shadows will show up the most, it giver the photographer a reference and a large level of control in the studio,.
spot lights are used as more powerful lights for lighting a large or small area, spotlights do not usually have specialised studio flashes but instead act as continuous light souse in a studio environment but spotlights do have useful accessories and features that are useful when in a studio, the have similar add ons that monoblocks use but spot lights being bigger and bulkier than monoblocks they need specialised fixings and equipment to use.
box light, strip light & light panels
box lights are used for strong direct light and made to be portable for outdoor portrait setups, the light can be fitted with diffusion paper to create the effect of a softbox and advanced versions can be programed for flexible uses. The advantages of the use of the box light is its compact, portable design and modifiable light, the issue is that the specialised box lights aren't as easily affordable or as varied as light panels.
strip lights can be fluorescent bulb lights or LED strip lights but both create a long bar of light that can be configured to create a highlight on a subject or create a softened light effect across a large area without the use of specialised soft boxes. the strips give of a large area of light which fills a larger portion of the image without using additional attachments to create the image and also the use of strips can create very unique effects and outcomes.
light panels are multi-light panels that come in many varying shapes and sizes and are used to give a strong and clear light source which do similar things to strip and box lights and have similar effects when photographing subjects and are also in a similar price range to box and strip lights, the only main difference is the way they are configured as a light board to give off a pure source of light, light panels are usually composed mostly of LED bulbs and give off a strong cool light onto the general direction the panel is facing.
flash gun & remote flash
flash guns are lighting units that can be connected directly or wirelessly to a camera to create a useful strong light source while photographing, they come with a lot of features and are very flexible when in use but when on the camera can loose balance and the flashes are very expensive.
halo/ ring light
the ring light or the halo light is a studio light which creates a continuous ring of light used in the same way a beauty dish meaning the halo is used a lot in portrait and makeup studio photography for the way the light creates less shadow on the subject and the way the light effects the eyes.
the halo comes in many different forms including a compact, portable form which is used in the same way as a flash gun except the light attaches directly onto the end of the lens.
fill lights are a wide range of lights used in the role in a studio to fill out he shadows, many lights can fill the role but specialised ones do the best job.
studio accessories
softbox
bowl flash reflector & guard
the bowl is placed on the monoblock to amplify the light emitted towards the subject and protect the flash bulb and modeling lamp. the light is shaped towards a single area which may be too harsh on the subject but many bowl reflectors allow the use of added attachments.
snoot
a snoot is an light attachment that intensifies the light emitted from the source by blocking all but the direct light out the end of it making a small point or spot light onto the subject. the snoot can use additional attachments to get different effects from the shaped light.
beauty dish
beauty dishes are used in the same way as halo light set are instead an adaption to a monoblock light, the dish itself can use added attachments and modifications.
reflector
diffuser
Diffusers are translucent materials and objects that are used to soften and spread out the light emitted from its source.
diffusers come in different forms and products, it can come in paper form, as a softbox or brolly and can come in the equivalent form of a reflector, reflectors also diffuse light rebounding off its surface.
brolly reflectors & diffusers
studio brolly are light adaptions used for shaping light in a studio environment, there are different types in different forms and shapes which themselves have different uses.
the brollys shape the light emitted in different ways, a reflector brolly gives of focused and harder light over a smaller or medium controlled area while diffusion brollys spread out softer light over a large area.
ring flash reflector & diffuser
the ring flash reflector works in the same way as a bowl reflector and a ring light diffuser in the same way as a softbox but both are specialised for use with halo ring lights.
lens hood
lens hoods are used to block light from the sides of the lens to remove glare and flare in the final image, the hood come in different shapes and sizes for use with different lenses or in different scenarios in indoor and outdoor photography.
light shapers & modifiers
light modifiers are objects that change the way light emitted from the source effect's the environment
the accessories added to the equipment like the honeycomb filter adds a different effect to the light, the comb filter softens the light emitted, some attachments like the universal spot magnifies the light in a certain directions.
filters: direct to camera vs flash attachments
filters used on monoblocks and spot lights give a colour to the image or the background allowing for a large level of control in the studio, cameras can use filters in a studio but the majority of the image would be affected.
tripod
a 3D tripod head is a tripod adaption which can be adjusted on three different axis giving precise and accurate control to the camera and its orientation.
a ball and socket head gives a easily possible and compact tripod head use for small adjustments to the camera's orientation for correcting a image.
brackets & mounts
photographic studios use mount and bracket fittings to use a stable platform for the equipment, this gives a studio environment an extra level of stability and control. the brackets and mounts allow better light and equipment placement, with advantages coming from things like wall or ceiling mounted lights and background paper.
background paper
background paper is used for adjustable and relatively inexpensive backgrounds in studio photography.
light,spot & exposure meter's
photographic combined meters allow for measuring exposure, flash and ambient light which is useful for getting perfect photographs in manual settings, spot meters get precise measurements of light from distance and simple meters can help teach one to judge light from eye.
slave sensors
slave sensors are used in flash set ups to synchronise a flash between multiple light sources, this feature is built into most modern mono blocks and attachments added to a camera will improve the accuracy of the synchronisation in the lighting set up.
Health and Safety in a Studio
Sensor & Film
 |
| selection of camera sensor |
 |
| Different types of cartridge film |
the difference's between the film and sensor
Digital vs chemical: Film is a silver crystal emulsion (silver nitrate), chemical compound that reacts to light creating a negative
Resolution: film resolution depends on the cartridge and processing while digital sensors change from model to model
Noise/Grain: Both recording medium have there shared strengths and and both suffer from random colour textures known as digital noise for sensors and film grain for film but this issue is easily fixed by the use of lower ISO's
Efficiency: overall sensors allow for a lot more flexibility than film with the ability to preview and review the photographs taken on a digital camera's LCD screen where as a film camera is dependant on the knowledge and skill of the photographer being aware of the mechanics at play and also having faith in the chemist when the images are processed and developed.
Cost: today decent film camera builds cost relatively little but a decent film can costs as much as a good memory card and the coasts of film used would increase quickly over time, while a decent digital camera is a lot of money for the unit but the coasts of storing images doesn't keep mounting over time due to the malleable nature of memory cards.
Convenience: digital photography's popularity is down to its incredible convenience compared the costs and commitments that come with a film photography, film is a medium for the specialised, experts and traditionalists due to the broad number of skills needed to get from the inception of the image in the mind of the photographer to the finished product.
Legacy:
digital photography is the primary type of medium of today
a graterning diversity in photography
majority of the world's silver used in film production
film has become a specialised field and area of photograph
SLR, film
different film cartridges:
fine black and white
high speed black and white
Fine colour
high speed colour
tungsten
infrared
polapan
polychrome
polachrome
DSLR, sensor
digital settings
memory card storage
digital settings
memory card storage
Digital memory cards
memory card types:
SD: SD or secure cards are the standard malleable
CF: compact flash or CF cards are cards with
SDHC: Secure Digital High Capacity cards or SDHC cards are memory cards
SDXC: Secure Digital Extra Capacity or SDXC
SD: SD or secure cards are the standard malleable
CF: compact flash or CF cards are cards with
SDHC: Secure Digital High Capacity cards or SDHC cards are memory cards
SDXC: Secure Digital Extra Capacity or SDXC
colour space
resolution and quality
camera time & date
card formating
white balance
Camera lenses
a camera lens
advance lense features:
lens stabilisation
cleaning & repair
cleaning & repair
Lens types
zoom
optic
optics are single frame lenses used for small increases to a camera's ability to zoom, optics aren't normally adjustable but due to the vast variation in products for different needs it's difficult to summarise the different specialties.
macro lens
Telephoto/super telephoto
wide angle/ultra wide angle
fish eye
tilt shift lens
catadioptric
Uses for lens and a lens strengths and limitations
(wide angle distortion, long vs short telephoto lens, variable/ wide ranging zoom)
examples of images taken with each lens
problem fix
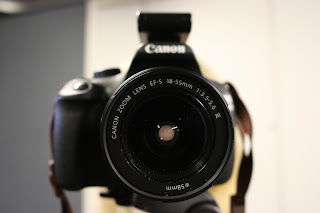
a zoom lens is a standard lens which is used on both SLR and DSLR cameras, it is flexible on its use although the common zoom's used is usually 18mm to 55mm or 18 to 75 mm's of zoom.
optic
optics are single frame lenses used for small increases to a camera's ability to zoom, optics aren't normally adjustable but due to the vast variation in products for different needs it's difficult to summarise the different specialties.
macro lens
Macro lenses are used for extreme magnification close up to a subject, while other lenses don't have the capability a macro lens can zoom in to a small object like a bug or texture and capture an image containing the most minute of details but with the coast of a minutely shallow depth of field.
Telephoto/super telephoto
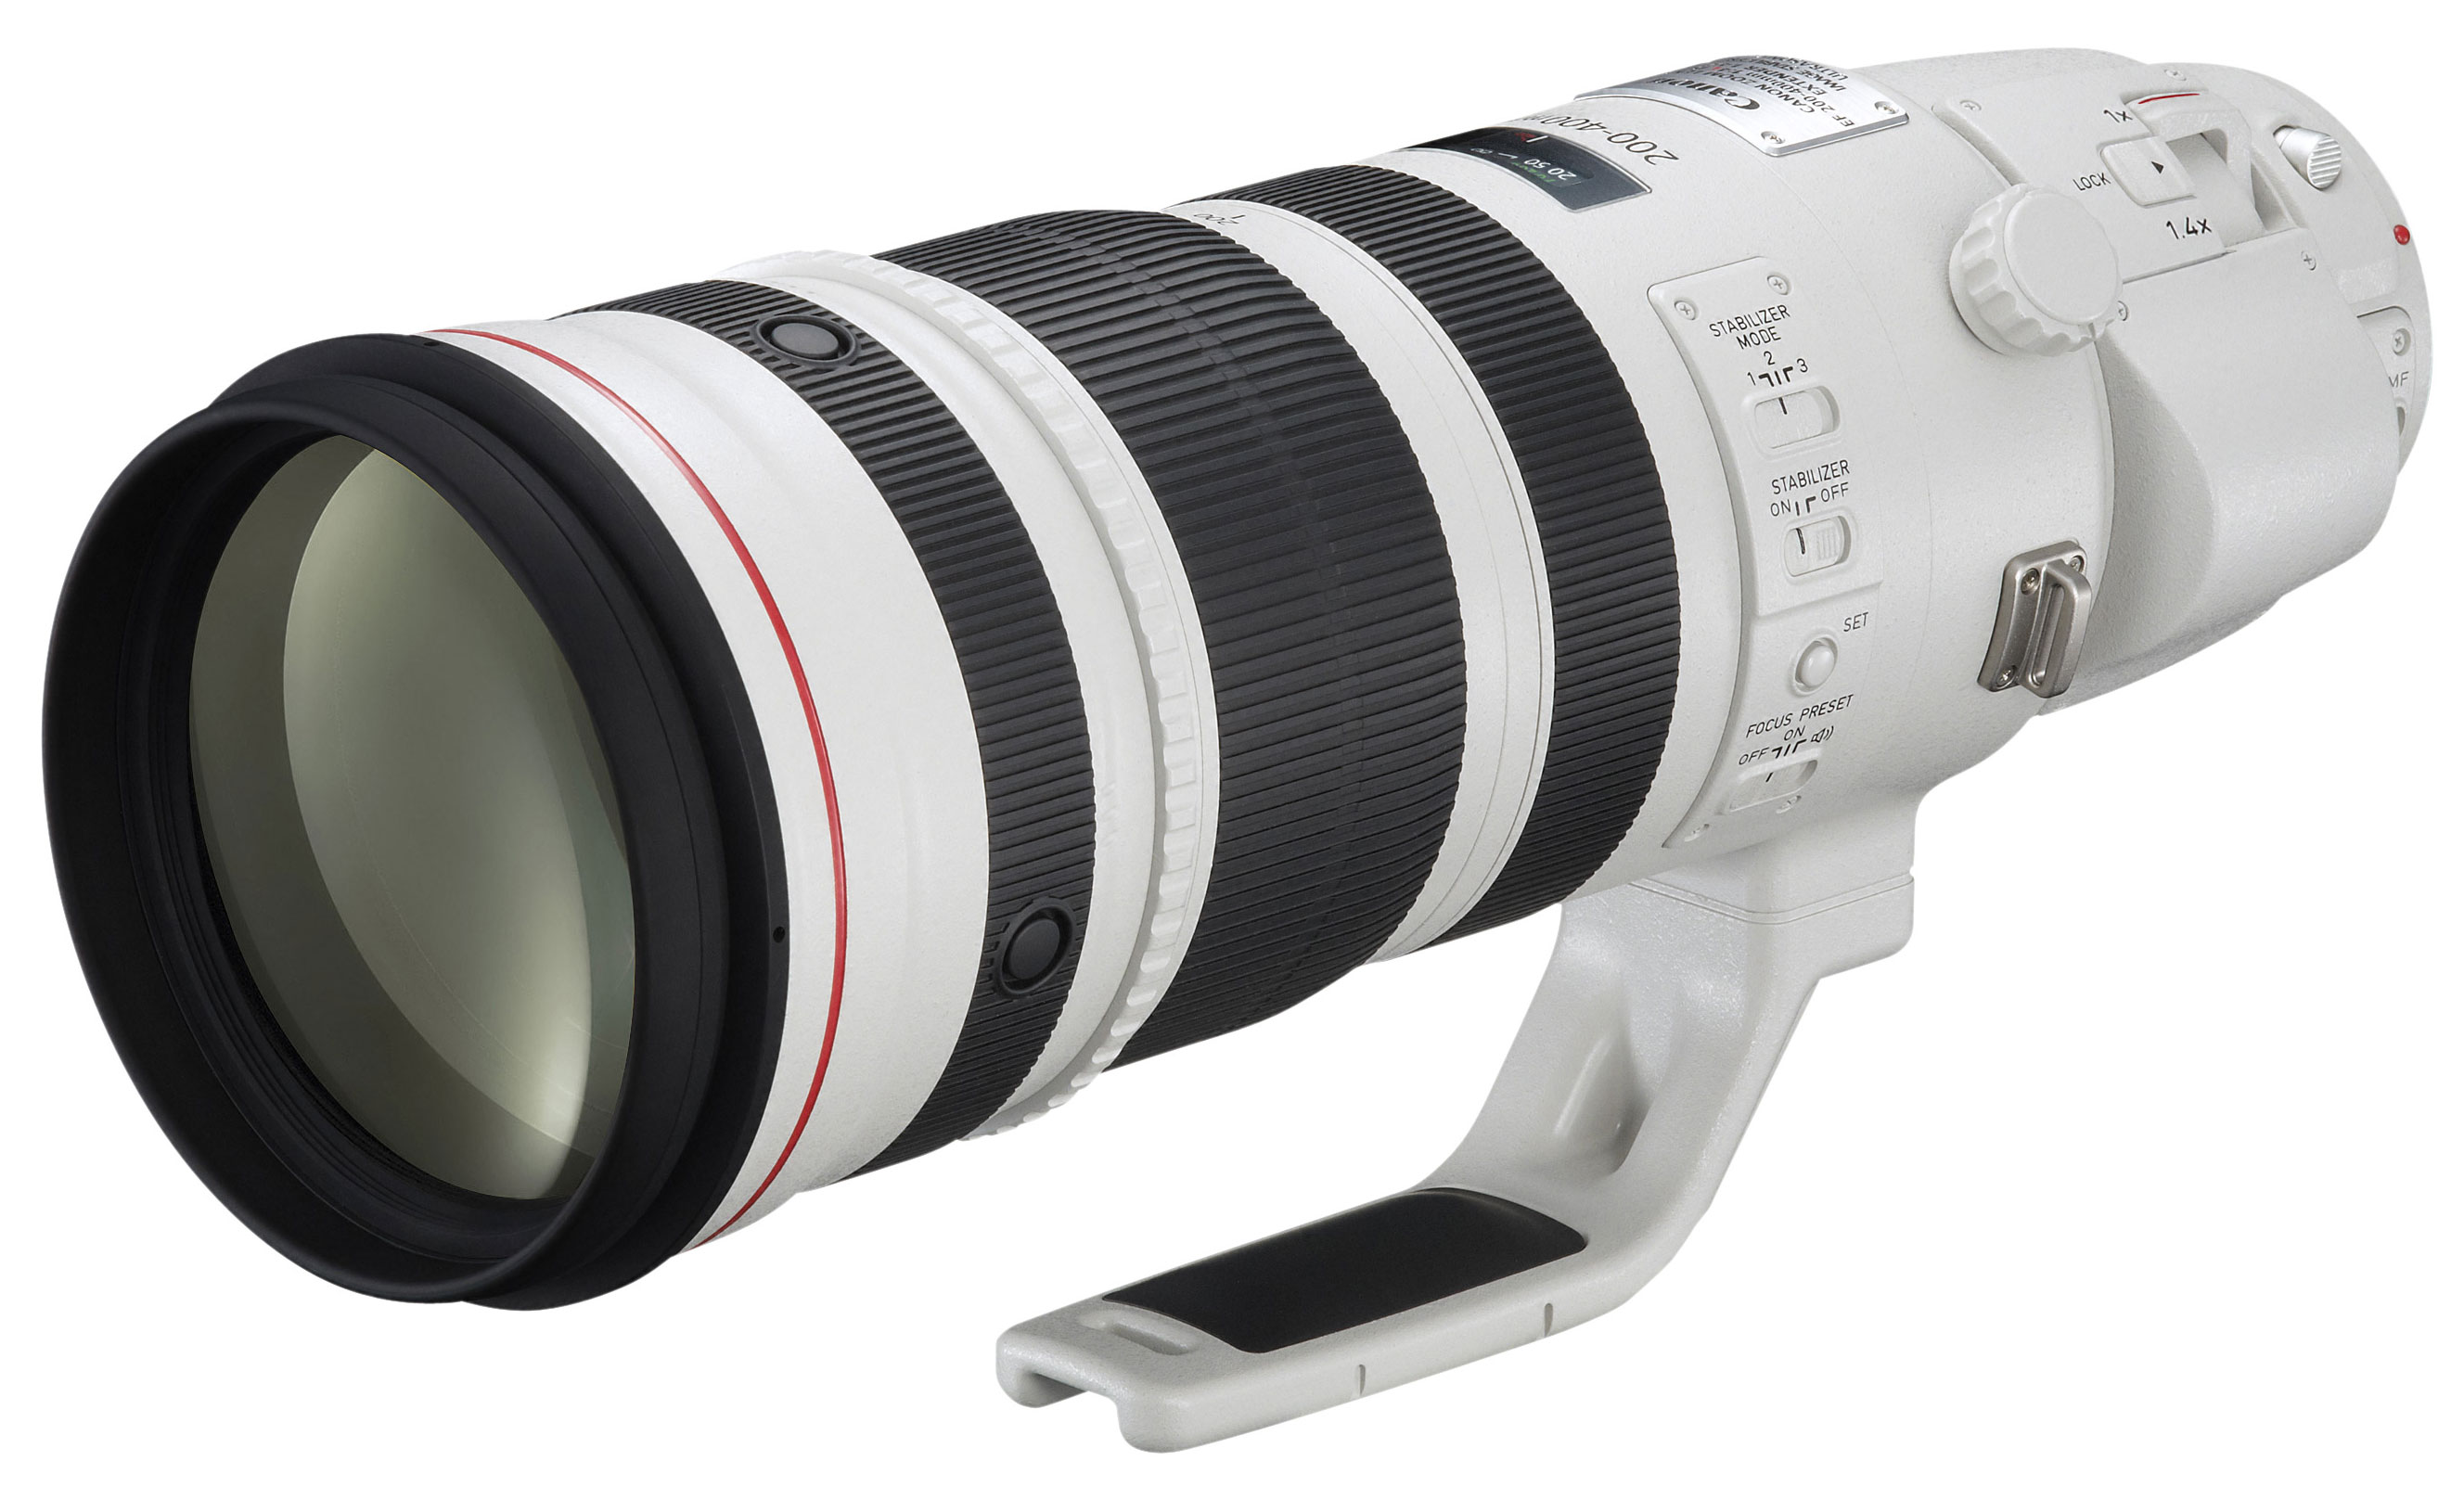
telephoto lenses are used for long distance photography
wide angle/ultra wide angle
a wide angle captures a larger area than standard lenses tough images will suffer from warp
fish eye
fish eye lenses are the equivalent to extreme wide angle yet take full advantage of the warp
tilt shift lens
catadioptric
Uses for lens and a lens strengths and limitations
(wide angle distortion, long vs short telephoto lens, variable/ wide ranging zoom)
examples of images taken with each lens
problem fix
Image composition & Photographic techniques
Selection of composition techniques:
composition is the arrangement and dynamics of an image , referring to placement of relative objects and elements within the image. the awareness of composition in photography is something that is part conscious and unconscious in the sense that you need to understand effective placement when capturing the image so that someone who hasn't developed an understanding in image composition can still notice the effect expressed in the image and what makes it a photograph and not a casual snap photograph. there are many variables that make a good photo and over time observable guideline have developed and evolved and with them came new photographic techniques, though all don't always need to be used its best to keep the elements of composition in mand as reference when working in the field of photography.picture composition
basic image composition
rule of thirds
the rule of thirds is the idea of a originally metaphorical divide used to help compose an image
avoiding center:
avoiding the center is important when composing an interesting image, when a subject or point of interest is displayed centrally in a photograph it creates a static
Natural & Artificial lighting
summarise light: light frequency
golden mean
viewpoint/ perspective
contrast
leading lines
horizon lines
vanishing points
light & shadow
texture
colour
shape
tone
adjacent
pattern
geometry
levels
abstract imagery
juxtaposition
silhouette
backlighting
orientation
luminance
framing
symmetry
rule of triangles
overlap
radial
golden hours
off center
angles
orientation
proportions
movement
aspect ratio
zoom
fill frame
distance
colour balance
simplicity
Depth of field
Depth of field is defined as the amount of distance between the nearest and farthest objects that appear in focus to the point of sharp focus, the depth of field in a image is controlled by aperture.
The aperture is the opening of the lens acting as the control of the pupil controlling the amount of light is aloud into the lens, F/stops are a measurement of the aperture with a small number f/stop the larger aperture. The f/stops have to be supported with modification of the shutter speed to countered over exposure.
The aperture of the lens iris gives different forms of depth of field depending on the dilation of the iris. Depth of field is the area of focus in a image and the focus of more blurred areas of the image.
The focal length and distance shallows with larger aperture and deepens with smaller aperture.
The foreground of the image is in clear focus while the immediate back ground is blurred out, the f/stop used to take this image was f/1.8 using a fast shutter to counter over exposure, this gives the image a shallow depth of field.The aperture of the lens iris gives different forms of depth of field depending on the dilation of the iris. Depth of field is the area of focus in a image and the focus of more blurred areas of the image.
The focal length and distance shallows with larger aperture and deepens with smaller aperture.
the foreground is still in hard focus while the background is focus but light than the foreground, to achieve this image I used the f/stop f/32 and a slow shutter countering under exposure, this also gives the image a deeper depth of field with the image having more focus.
the use of a large aperture have small depths of field which are used for more macro shots but can give depth to the image depending on the image.
while small apertures are used for depth of field which would allow you to get a hole landscape in focus. but with greater depth of fields the focus blur is softened.
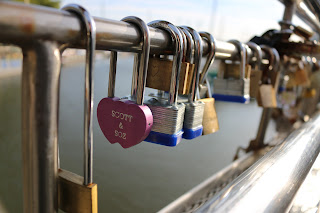 The use of depth of field is down to what can be done with it and how important it is in composing a image, with a shallow depth of field of f/2.8 only a small area is in sharp focus with the rest of the image being blurry, While at f/22 would give a very Deep depth of field with a large portion of the image would be well focused.
hyperfocal distance & perceived depth of field
ISO & Exposure settings
The ISO is the way to control the sensitivity of the camera's sensor or film is to light, ISO helps gather light and create it into an image depending on the available light. The lower the ISO number, the less sensitive the sensor is to the light, while a higher ISO number increases the sensitivity of the camera sensor. The standard base ISO is 100 and the highest ISO on a standard camera is 3200 with a counter shutter speed of 1/60 sec but DSLRS can go to ISO 12800 with a counter shutter of 1/250 sec but the Image when zoomed In will suffer from noise. Image noise or grain are random colour pixels in photographs and it is a great problem in low light but to get the correct exposure requires the use of slow shutter speed or a long exposure time and a higher gain or ISO sensitivity.
The ISO noise at high levels as explained before can be dealt with by selecting a counter shutter speed to greatly lesson the noise or grain effects yet grain will still be present in the image, with out modification of shutter speed ISO 100 would have the least digital noise while each time the ISO doubles noise becomes more coarse and prevalent.
The ISO noise at high levels as explained before can be dealt with by selecting a counter shutter speed to greatly lesson the noise or grain effects yet grain will still be present in the image, with out modification of shutter speed ISO 100 would have the least digital noise while each time the ISO doubles noise becomes more coarse and prevalent.
correcting ISO with Shutter Speed Example: Low light environments
ISO 100 – 1 second
ISO 200 – 1/2 of a second
ISO 400 – 1/4 of a second
ISO 800 – 1/8 of a second
ISO 1600 – 1/16 of a second
ISO 3200 – 1/32 of a second
All the following Images were taken in the same light conditions with the only changing variable's being ISO and Shutter speed:
All the following Images were taken in the same light conditions with the only changing variable's being ISO and Shutter speed:
Image 1) the first image has the least noise even with correction, taken at ISO 100 – 1 second
Image 2) ISO 200 – 1/2 of a second
Image 3) ISO 400 – 1/4 of a second
image 4) ISO 800 – 1/8 of a second
Image 5) ISO 1600 – 1/16 of a second
Image 6) ISO 3200 – 1/32 of a second
Image 7) ISO 6400 - 1/64
Image 8) the 8th image has the most grain when zoomed in, the level of noise has been corrected but is still prevalent in the image when compared to other images, image taken at ISO 12800 - 1/128
the change in grain level is slightly different between each of the individual ISO settings even once corrected but the difference between the largest ISO number and smallest ISO number is more apparent, the change is seen with high ISO's and long exposures, the longer the exposure and higher the ISO the grater amount of grain or noise.
1) Image one has the most noise, it was taken at ISO 3200
2) Image two has much less noise when zoomed in, taken at ISO 100
The balance between Aperture & Shutter speed
In photography the use of a camera flash, ISO modification is a photographer's last resort when trying to correctly expose an image, the ISO should be locked between ISO 100 and 400, if any higher texture grain or image noise world gradually become more noticeable as the ISO number go's up. The best thing to modifi is Aperture and Shutter speed, the the two if in balance will create consistently correctly exposed images but there are risks when both Aperture and Shutter speed stay in balance.
the correct application for balance
the risks are mostly in realms of the small dilated iris or high F/stops with long exposures and the effects of dark environments on the outcome of an image and how it can also lead to a change in the ISO, the sensor sensitivity, if ISO number is raised so dose the amount of image grain or digital noise.
within these situations ISO modification may be necessary, the us of camera flash is down to the situation it is used but in most normal photography it should almost never be used.
Shutter speed
The shutter speed is the time that the censor or film is exposed to light, the time is measured in seconds and percentage of seconds, this is modified using shutter priority which increases and decreases the exposure time. To deal with over exposure when using a long shutter speed you need to counter using small apertures & decrease ISO, and short shutter times suffer from under exposure, to counter this you would have to use a larger aperture to allow more light into the lens. The shutter is the object covering the sensor or film and is timed on the Tv setting on the canon 70D DSLR
changes the shutter speed.
1/05
at the shutter speed of half a second allows the sensor a long exposure time to be able to capture movement but the problem is the camera will suffer with over exposure with to much light.
1/8000
The shutter at its fastest speed freezes all movement perfectly clear. you can in the image that the water going over the fall is clear with no motion blur but the image may come out under exposed.
1/8000
the image when captured at the fastest shutter setting captures in still details
1/10
the effect of movement on the censor is apparent with the bike taken at 1/05 with light reflected off the subject spread across the image
1/05
the car was effected in the same way the bike was with the reflected light stretched the shape of the car showing its movement
1/03
Aperture
The lens aperture is a diaphragm commenly know as the iris that is in the lens itself or behind it. It affects the amount of light that passes through the lens and is usually made up of a set of blades that open or close depending on the aperture setting selected. The aperture settings are commonly referred to as f-stops and have a specific numerical sequence, usually starting at F/2 and up with the common cap for how small the iris gets at F/22 buy quite a few cameras can go further. Lower f-stop settings of F/2 and up have a larger Iris opening, allowing more light through the lens. On the other hand, Higher f-stop settings of F/11 up have a smaller diaphragm opening, allowing less light through the lens. with too dark or bright images caused by modification of the F/stops a modification to shutter speed would be necessary but if a photographic venue was too dark and a large shutter would be too blurry modification to ISO would be needed to improve image brightness but with the sacrifice of added image grain or digital noise.
The Camera
A photographic camera is a form of recording media used to capture still images
basic camera controls and settings: Canon ESO 70D
Manual
Auto
flash off
P/
TV/Shutter speed
AV/Aperture
B/
C/
SCN/
[CA]
Adjustment settings:
functional use guide:
maintaining the camera:
Manual
Auto
flash off
P/
TV/Shutter speed
AV/Aperture
B/
C/
SCN/
[CA]
Adjustment settings:
functional use guide:
maintaining the camera:
Camera: The exposure triangle
the exposure of an image is controlled using aperture, shutter speed and ISO.
shutter speed: controls the amount of time the sensor or film is exposed to light.
aperture: is the dilation of the iris allowing a sustain amount of light through to the censor.
ISO: the ISO is the level of sensitivity of your camera to available light.
Exposure Control:
bracketing exposures
Cameras: Compact, Bridge SLR & DSLR
SLR vs. DSLR cameras
all Single Lens Reflex cameras are difference between SLR and DSLR is primarily the difference in the recording medium they use, the SLR is a classic film camera, conventual using 35mm cartridges of film. DSLR or digital SLR's use malleable memory storage devices like SD cards to store the images that are captured using a sensor instead of using film. DSLR's are quickly replacing SLR's
A compact is a small "pocket" camera used by more casual photographers for snap photography, small compact cameras have been around for a long time but became more common in the later half of the 20th century with the introduction of throw away film cameras used for holiday snaps. modern compacts work on the same principles of Digital SLR but with a few sacrifices to gain its compact status, these sacrifices vary from model to model but the principle of using a sensor to capture and a digital memory to store it remains the same.
Bridge cameras
Positives & negatives
Health, Safety in IT & Photography
Things to keep in mind as a photographer
IT/ digital hardware and software
Camera safety:
Camera safety:
- use strap to ensure camera isn't dropped and damaged
- protect the lens with sun cover, clear filter or sun guard
- have spare batteries
- understand copyright
- have memory backups
Outside: Problem & resolution
- have someone aware of your destination and whereabouts
- keep a form of communication on your person
- understanding possibility of direct threats to the photographer and his equipment
- keep equipment close to leave it less vulnerable to thieves
- avoid going without assistance or allies
- know where you are and you geography
- keep a log of your whereabouts to avoid getting lost
- stay aware of surroundings and of conventions of everyday life
- keep track of time
- understand laws and rights
Studio:
- avoid trailing wires
- no blocking fire exits
- ensure equipment is set up securely
- be aware of emergency procedures and near by first aid assistance
Dark room:
- protect cloths & eyes
- no light sources
- keep track of processing time
Summary and evaluation
this unit has taught me many technical aspects regarding hardware (IE, cameras, computers ETC) and software regarding post production and digital management.
I have covered camera settings, post production work, studio set up & equipment and also health & safety aspects regarding all photography.
I will use this folder in the future as a reference and guide in my future endeavours and work in photography, I will also continue to update this folder as I learn new skills and develop my understanding in the field of photography.
















No comments:
Post a Comment